Toggle Nav

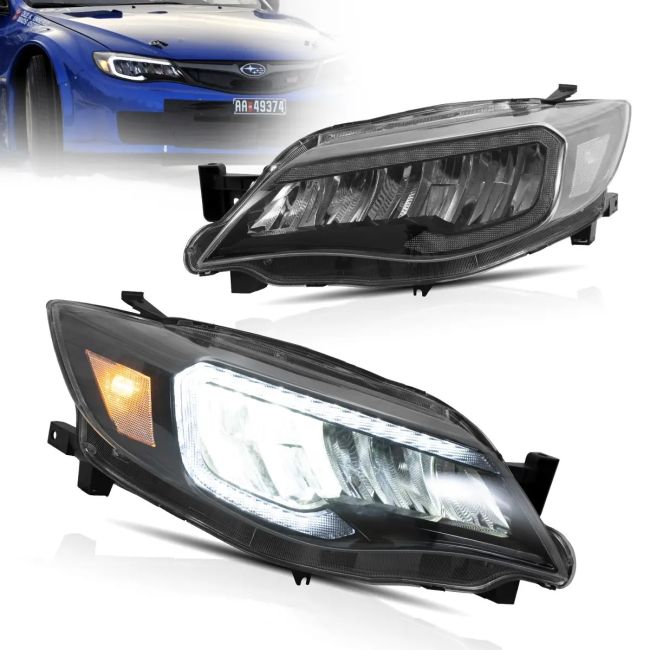


08-14 Subaru Impreza WRX 3th Gen (GE/GV/GH/GR) Vland LED Reflection Bowl HeadLights Chrome
$559.99
How To Install A Set Of Headlamp Assemblies
If the front of your vehicle is its “face”, then the headlamps have long been considered the vehicle’s “eyes”. Everyone notices them. One of the most distinctive changes you can make to the face of your car or truck is to replace the factory headlamp assemblies with a custom set. Your ride will take on a personality all its own, and will gain a distinctive appearance that will set it apart from all the other look-alike vehicles on the road.
Lumen headlamps are designed to fit in the exact location of your factory units and cost less than you might think. In the scope of this article, we’ll review the step-by-step basics of installing complete headlight units designed for your specific vehicle.
Before you begin
For any new part, headlights, or otherwise, it’s always a “best practice” to start by unpacking the components and verifying that everything is in good shape. For your new headlamp assemblies, remove them from the box and ensure that there is no physical damage.
If your headlights have single wires for DRL or halo lights, touch these wires (red or white are usually positive, and black is usually negative) to a 12-volt source such as the car battery to ensure that all lights function.
Make sure that everything you ordered is included, and if the light manufacturer included their own installation instructions, use them along with this guide.
Removing & Installing Bumper Covers (If Required)
Tools needed: flat wrenches, socket wrenches, rivet gun (on certain vehicle applications), screwdriver(s), Torx head bits (if applicable), electric drill (if applicable)
This is often the first step because many modern vehicles require the plastic front bumper cover to be slid loose an inch, or completely removed in order to access the anchor points where headlight assemblies bolt on. If you’re not sure whether this step is needed, we recommend checking with your vehicle manufacturer or accessing a repair manual online. Removing and re-installing the front bumper cover is relatively easy because most are designed to unbolt and slide off with basic hand tools.
Taking a close look at the bumper cover, you’ll notice that the bolts which secure it in place are typically exposed once you open the hood. They can also be found underneath the vehicle where the bumper cover meets splash shields and near the edge of wheel well openings where wheel well liners meet fenders. There may also be small plastic caps or clips covering such bolts, so remove them with a small flathead screwdriver.
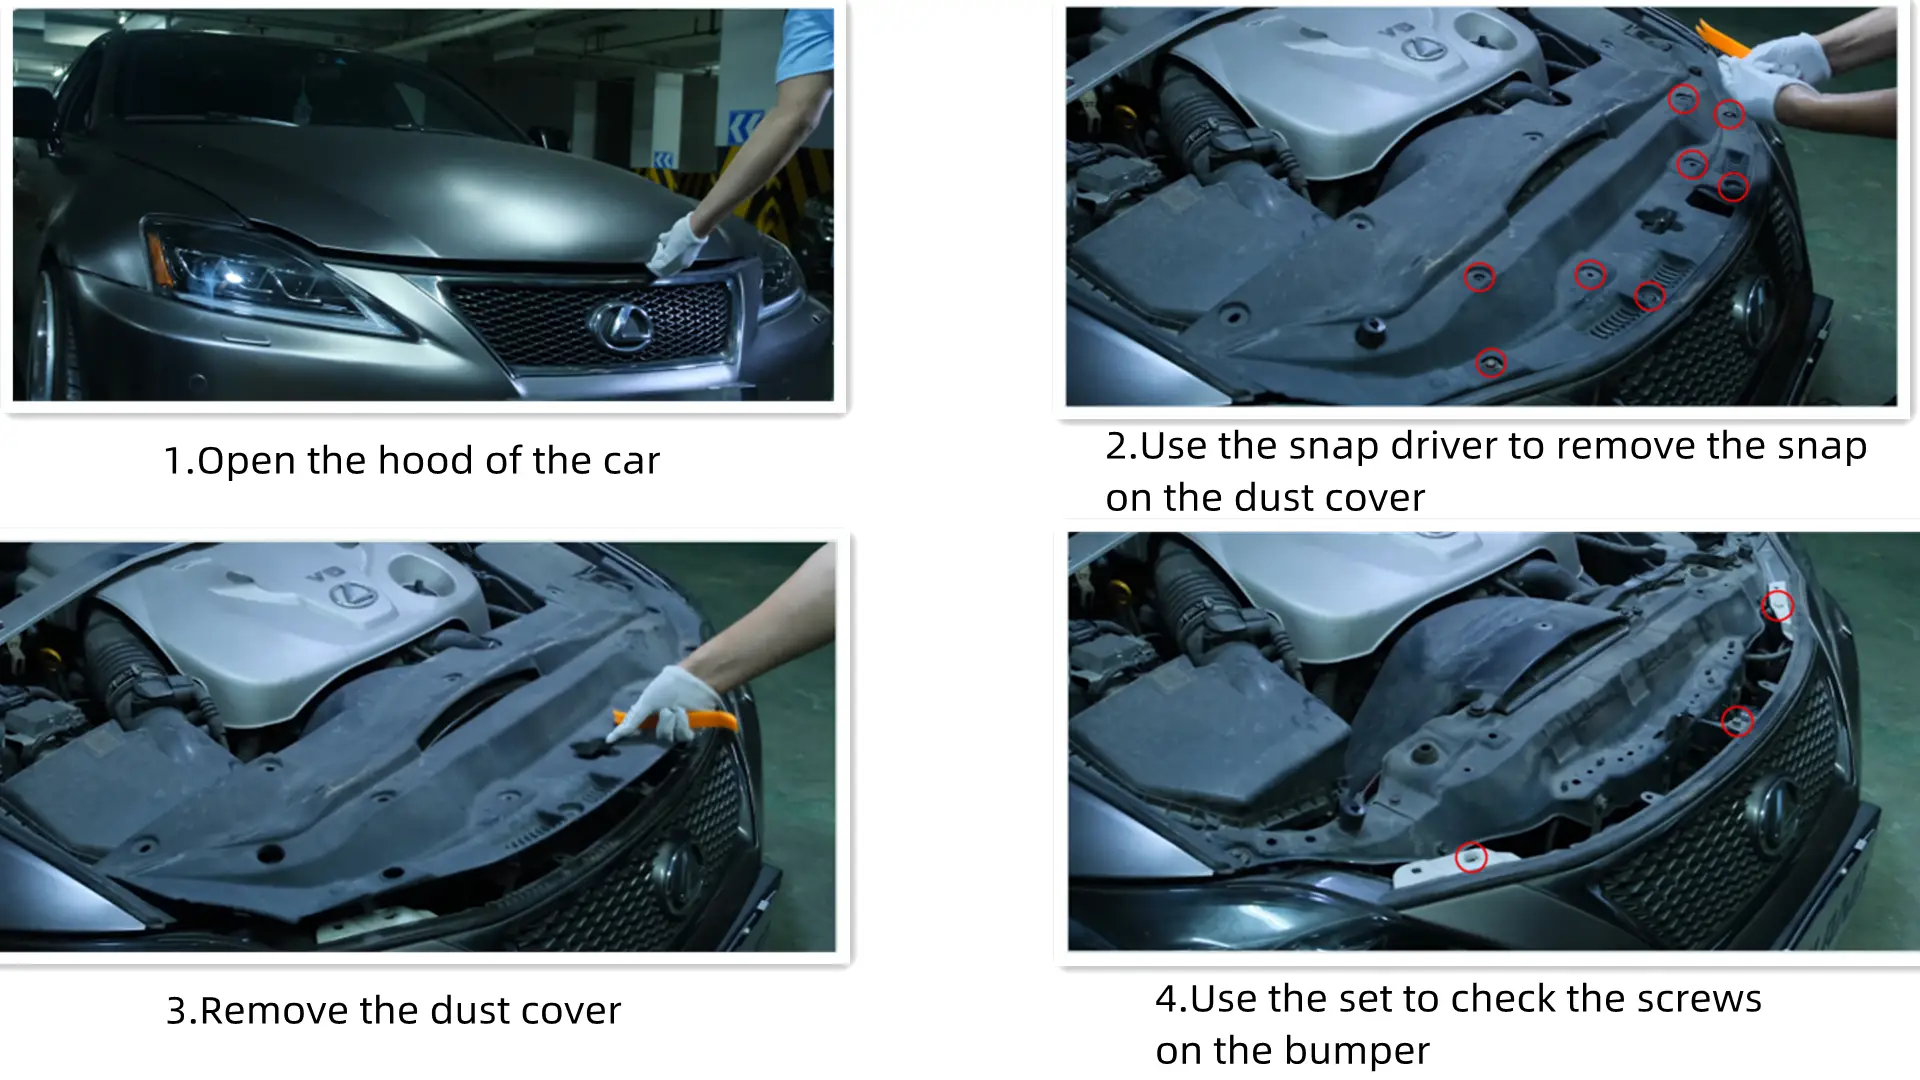
Remove the bolts themselves with an applicable socket wrench or flat wrench. In the event your vehicle manufacturer has used rivets to secure things (wheel well areas), they’ll need to be drilled out with a traditional drill. Then you’ll need a rivet gun to reinstall new ones – not an expensive purchase, but the proper tool to use. When drilling out rivets, bits designed for drilling into metal are most suitable due to a higher heat rating.
Once all fasteners are removed, the bumper cover can be detached. Many are designed to slide horizontally along special bracket pieces mounted underneath before coming completely loose, so move the bumper cover in this fashion first if you aren’t able to obtain specific instructions on your make and model.
Unbolting Your Old Headlamp Assembly
Tools needed: Socket wrench, screwdriver(s)
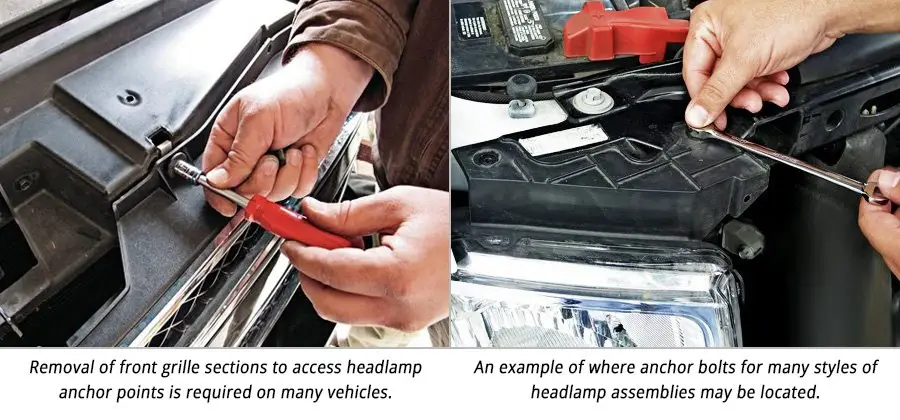
Depending upon the year and model of your car, you may need to remove your vehicle’s front grille section in order to access bolts or clips that secure the headlight assembly in place. This can be done by removing the screws from the top or sides of the grille and/or by releasing hold-down clips found on some vehicles with a flathead screwdriver.
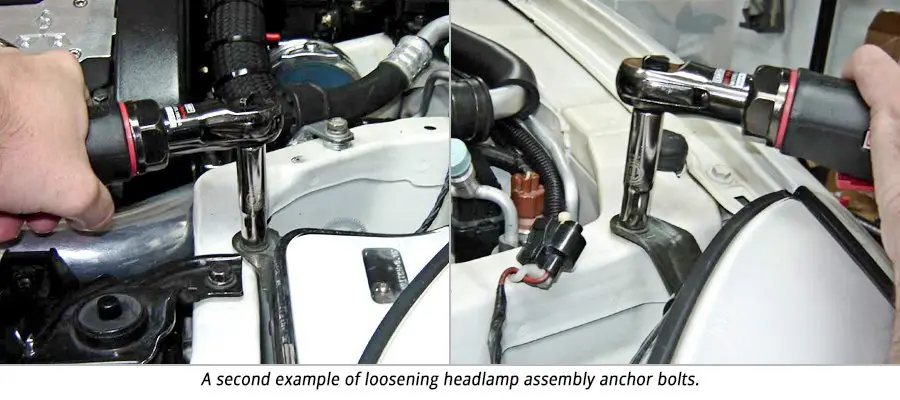
Once any grille, trim, and bumper cover sections have been removed in order to provide access to headlamp assembly attachment points, you can proceed with unbolting them – usually a small socket wrench serves best for such applications. Look for hold-down bolts in the metal body panels above and to the side of your headlamp assemblies. Some vehicles also feature hold-down clips on the headlamp assembly which can be released with a flathead screwdriver.
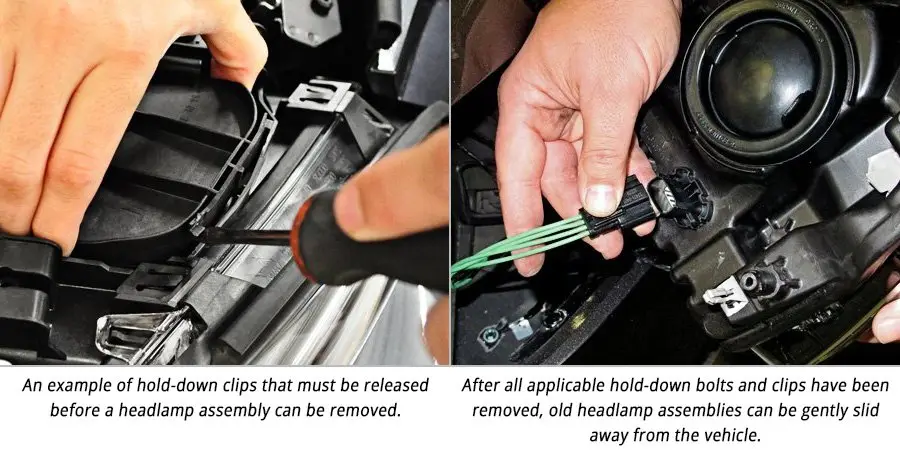
After all applicable hold-down bolts and clips have been removed, it’s time to slide your old headlamp assembly away from the vehicle – wiggling it gently as you go. Remember, unless you disconnected them earlier from behind, electrical wiring harnesses are still attached. Don’t remove any bulbs from your factory housings just yet. Set your OEM headlamp assemblies aside, in the event that you wish to reinstall them one day, for example, if you decide to sell the vehicle.
Disconnecting And Reconnecting Electrical Wires
Tools needed: Wire stripping tool, wire connectors, pliers (if applicable), electrical tape
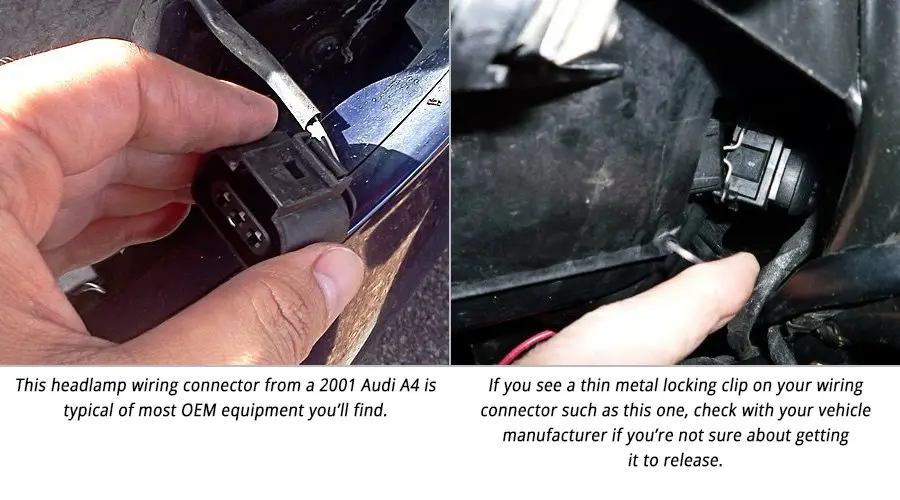
Once you’ve pulled the old headlamp assembly away from the vehicle a short distance, it’s time to get a full look at wiring harnesses that are attached. Even if you’ve removed one or more connectors from the rear of the assembly before unbolting it, there may be others (such as separate wires to side marker bulbs) still attached which were previously obscured. Once you can see everything, unhook any and all electrical connectors from the back of the headlight assembly. Usually, either a simple squeeze on the edges of the connector or pulling up on a tab is enough to cause the connector to release its grip, but if a thin wire bar is present, it usually needs to be slid into an unlocked position first. If you’re not sure how a locking clip is designed to release, it’s best to further research instructions for your make and model.
You are now ready to begin installation of the new lights. We will make all of the electrical connections first, while we have access to the backs of the assemblies. Then we will perform the mechanical install into the front of the car’s body.
Availability:
In stock
SKU
hl-YAD0372-2D31C
08-14 Subaru Impreza WRX 3th Gen (GE/GV/GH/GR) Vland LED Reflection Bowl HeadLights Chrome is available to buy in increments of 1
Reviews
Write Your Own Review